Blog Archives
The video
I know some of you have been breathlessly awaiting the videos taken of our Venus-erecting (hee hee) escapades last weekend. It turns out that the video is a) mostly boring and b) a giant pain in the arse to edit. So, I present to you the one and only part of the entire footage that is worth sharing:
Success!
Mum and I just had another crack at setting up the tent. It was a much more successful outcome this time. I think we got it all done in around 20 minutes… but the video will tell. Yes, we took videos of it. I’ll edit it and put together a YouTube of our experience. 🙂
First impressions of the Venus III
I know I promised to write a bit more about the Venus III tent. So now that I have time, here’s a bit more. If you want to see all the photos we took, have a look at this post.
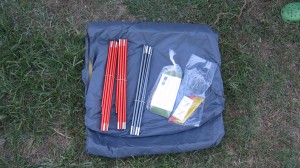
The tent came rolled up in a black carry bag, sort of like a stuff sack. We took a couple photos of the contents. Basically, there’s the tent, a bag containing pegs, poles and an accessories kit (which I haven’t yet opened but appears to contain a repair kit). Rolled up, it’s about the size of a small duffel bag. With a bit of rearranging, I think it will fit OK on the back of a bike rack.
The poles are colour coded so that dummies like me can figure out where to stick them. The tent has little coloured tabs at the point of insertion. Red poles go into the red-tabbed sleeve. There’s a single grey pole, and unsurprisingly, it goes into the grey-tabbed sleeve. This grey pole serves as the ridge for the top of the tent.
I also got a footprint for the tent. Exped claim their tent floors are super-tough, but to be honest the floor feels a little flimsy to me. I’m glad I got the footprint too.
The footprint didn’t come with any sort of anchoring mechanism (ie pegs), so we improvised by using rocks and dog toys. If we hadn’t, it would’ve blown away and that would’ve been the end of it. I’d also like to point out that it didn’t come with any instructions. Now, I know that a seasoned camper would know everything there is to know about using a footprint, but I am neither seasoned, nor a camper. I found this video after the fact, which helped a little, but I would’ve preferred to have seen its installation from the get-go, rather than just focusing on affixing it after it’s already been deployed. I know it might seem self-explanatory (put groundsheet on ground, put tent on groundsheet), but there was a bit more to it. There are tensioning elastics on each corner, but no instruction on how to use them, what to attach them to, or how tight to make them.
The footprint conveniently has a small label at each pointy bit that says “door here”. We saw this, marvelled at its handiness, then promptly plonked the tent down so its doors were not aligned with the door ends of the footprint. I did say we’re not seasoned campers, didn’t I? 😳
The tent itself came with these useful instructions:
Setup
1. Unpack: Unroll the tent fly side up and secure with two pegs at the footend. In strong winds open both door and rear vent to prevent ballooning and the tent from flying off.
2. Poles: First feed the parallel poles and then the ridge pole gently into their corresponding colour coded pole sleeves until seated in the opposite sealed end. Then insert the pole ends into the tension pocket and pull tight.
3. Tension: Secure with pegs in the corners and vestibule. Tension the premounted guy lines forming a star pattern that radiates from the tent’s centre. In high winds use additional pegs and guylines found in the accessory bag.
Setup variations
1. Rainfly only setup: unhook the canopy and feed the poles into the sleeves, insert pole ends into the tension pockets and pull tight. Secure corners and vestibules with pegs.
2. Canopy only setup: Unhook the rainfly and feed the tent poles through the elastic loops of the canopy. Insert the pole ends into the webbing loops found in the canopy corners. Tension the canopy by attaching a guyline each to the centre of both poles and anchor with two pegs.
Teardown
1. Stakes: Remove all stakes and release the tension of the pole pockets
2. Poles: Push the poles out of their sleeves (never pull). Fold the poles from the centre out. Clean and dry the poles before stowing them in the accessory bag.
3. Pack: Canopy and rainfly may remain hooked together. Spread out the tent, fold the vesitbules inward, then fold the long sides of the tent in thirds so the width corresponds with the packsack size. Place the full accessory bag at one end of the folded tent as a rolling aid and roll tightly into the packsack.
And that is the extent of the setup and teardown instructions. Did I mention we’re camping n00bs? Important questions go unanswered. Things like: What’s this doohickey? And what’s this doodad do? Important information such as “colour-coded .. yellow coloured loops placed on the leeward side for easy orientation during setup”, would’ve been better included in the setup information than as an aside in the “features” section. As it turns out, I’ve found out much of the information by trawling Exped’s site for videos. In fairness, the videos are great, and they do a great job of explaining things, but explanations should be in the user manual! The user manual should consist of more than a half-A4 printed sheet!
Things like how to tighten or release tension of the damn poles! It’s assumed that we already know this stuff, but… WE’RE N00BS!!!!!!!!!!!!!
And how to use the guy line stuff sack and tensioner doodads:
An explanation of the difference between the red tent pegs and the yellow ones!
I know a picture says a thousand words, and a video probably says ten thousand, but this sort of information should’ve been included with the tent. Even experienced campers didn’t come out of the womb knowing all this stuff. Exped, do you understand what I’m saying here???
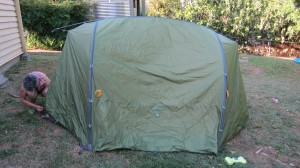
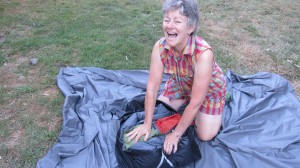
OK. Now that I’ve got that out of the way… setup of the tent was mostly painless. We couldn’t figure out how to increase or release tension on the pole boots (again, the video… sigh…), so we struggled a bit with getting the poles into their receptacles. No wonder mum was delighted with her achievement:
It was at this point we realised the tent was out of whack with the footprint.
Once it was up, we realised that the floor wasn’t particularly tight and it was somewhat misshapen as a result. A bit of faffing about rearranging the base and knocking some pegs in and bumbling around, and we got it looking a bit better. Next step: inflation of the sleeping mats! I think these did come with useful instructions (I can’t find them just now), but I had already seen the mat-inflation video, so we had a pretty good idea of how to set it up.
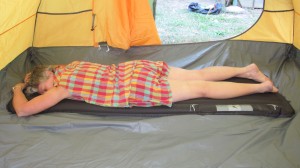
Without much in the way of directions, mum figured out how to inflate the mat, then had a well-deserved rest on it.
After we sat in the tent for a bit, gloating about how wonderful our tent-erecting skills were, we set about pulling it all down again. This part was actually pretty straight-forward.

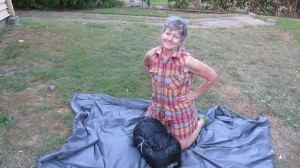
She claims she was just holding it down, but I think the thought of trying to fit it back into its bag was just too much, and she collapsed under the weight of her own expectations
Despite the weight of expectations, and the sneaking suspicion that the tent would never again fit back into its stuff sack, we were pleasantly surprised. Not only did it fit back into its stuff sack, it did so without much effort.
This is the part that impressed me most. Pretty much every tent I’ve ever used has never fit back into the factory packing. So Exped can definitely chalk this up as a feature worth bragging about.
I did take some photos of the inside of the tent, but they turned out pretty crap. We’ll be putting the tent up again this weekend and actually sleeping overnight in it, so I’ll be sure to take some more photos and to better document the process (videos coming at ya!). I’ll also make a point of bookmarking the videos on my iPad so that we can refer to the videos whilst actually performing the setup.
All in all, I think we spent about 30-45 minutes figuring things out and putting the tent up and getting it just right. With practice, I’m sure this will be reduced to under 10 minutes. I’m not convinced we’ll be able to do it in under five minutes like the Exped guys, but I can live with ten minutes.
First impressions of the tent itself are very good. Despite my n00bness, I can see that the tent is well-designed, robust and looks like it will be perfect for our needs. I’m glad we decided to go with a freestanding tent instead of one that needs guylines set up all over the place to put tension into the fabric. There’s plenty of room inside for two sleeping mats and lots of stuff. There’s room at both the foot and head end of the mats, so there’s no bumping into the fabric of the tent in our sleep. And the vestibules on each side ensure we can get out for a midnight pee without tripping over the other person. So far, so good! 😀
The Exped Venus III – some photos
Mum and I decided to set the tent up in my back yard yesterday. We need to learn the process of setup and teardown long before ever using the tent in anger. I secretly wanted to test Exped’s claim that it could be set up by one person and that it could be done in under five minutes. Their YouTube videos show one of their guys setting it up super-quickly, so surely it must be super-quick for camping n00bs like us, right?
I have quite a bit to say about our experience, but I have to go get ready for work. For now, here are some pictures to keep you interested. Mum has very graciously modelled in these photos.
The Exped Venus III tent has arrived!
I’ve just received a nice big parcel from Amazon, containing an Exped Venus III tent, a footprint for same, two Exped DownMat 7s and two Lonely Planet cycling guides (Australia and NZ). $900AUD shipped (it arrived in four days!). As much as I wanted to support local businesses, I just couldn’t justify the extra $300-$500 (depending on where you shop) to do it. Despite Exped’s proclamation that their overseas resellers will not ship to a country that has a local distributor, Amazon didn’t have a problem with it.
I considered a number of tents. In the end, I decided on the Venus III because it’s free-standing, has plenty of room for me and my mum and our stuff, and it’s four-season. It’s a touch heavy by touring standards (4Kg), but I’m OK with that. Mum and I can divide the load of the tent and other stuff so neither of us is too burdened. If I ever decide I want to go solo touring, I’ll either suffer the weight or get myself a smaller, lighter tent. For now, this suits our needs.
I’ll be setting it up in the back yard this weekend. Pictures will be taken and posted here for your viewing pleasure ![]()
Is there anything Amazon doesn’t sell?
Much to my surprise, Amazon sell Exped tents. Specifically, they sell the Exped Venus III. Even with shipping, it’s hundreds of dollars cheaper than buying it locally. One more sale to Amazon, one less sale to local businesses. I’m chuffed to have found the tent much cheaper than here. But I’m also cranky about basically being forced to not support local business. If it was only a matter of $50 or so, I would’ve bought locally anyway. But hundreds of dollars cheaper.. c’mon, Australian distributors. You need to do better.
I’m your Venus.. I’m your fire..
I’ve been thinking some more about the tents, and about some comments Aushiker made RE storage of food and other things whilst on the road. I’m now thinking the Venus III might be the go. Wanting to be sure about things, I sent the following email to Exped:
I’m trying to understand the basic differences between the Orion II and the Venus II/III. As far as I can tell, the Orion is slightly taller than the Venus II. Aside from that, they seem kind of the same, with the Orion being a touch heavier than the Venus II. The Venus III is obviously bigger than the other two. Aside from size, could you outline the basic differences between them? Can you confirm the Venus series is a 4-season tent?
I’m trying to prepare for a cycling trip in Tasmania (the cold end of Australia) and want to be sure the tent can deal with snowfall if need be. I was just about ready to drop the coin on an Orion, when a friend pointed out to me that I might want to consider storing our food containers within the tent rather than the vestibules, which has prompted me to look at the Venus III because of the bigger internal space. Will the Venus 3 be OK in the event of snowfall?
I know these questions are probably answered on your web page, but I’ve been trawling through the page and a bunch of others, and I think I’m having data overload. Please help 🙂
Exped got back to me within 12 hours. This is their response:
Thank you for your e-mail and interest in Exped. One major difference between the two tents is the full ridge pole on the Orion, versus the partial ridge pole on the Venus. It can be a little bit difficult to see in pictures, but the Orion’s ridge pole comes all the way to the ground in the vestibule (this accounts for most of the extra weight). So essentially, you have a pole supported vestibule that also adds to overall strength to the tent. This, in turn, pushes the peak height of the Orion up a bit higher than the Venus. Both models are built for all season use (both will handle a snow load), but the extra grounded crossing pole on the Orion does give it more structural strength than the Venus.
So: Orion = slightly stronger (though if it’s blowing so hard that the Venus is blown over/away, I think we’d’ve escaped to a motel anyway), and Venus = more room.
I’m inclined to think that the Venus III will suit us better, overall. I do love my mum, but there is such a thing as spending too much time together! That extra little bit of room could be the difference between enjoying each others’ company and going crazy!
I thought camping was supposed to be cheap!
You know, cheap, as in not expensive. Here are some prices for the tents I’ve previously mentioned. Exped Venus II: $699. Exped Orion II: $799. Exped Venus III: $899. That’s retail, mind you. If we go onto the interwebz, I’ve seen the Venus III for as low as $500 USD, with free shipping to Australia. Still, that’s five hundred bucks! And that’s just for the tent. Sleeping mats, cooking stoves and pots etc, sleeping bags.. it all adds up.
And to compound that, here are some rates for off-peak camping if we go to caravan parks for our Brisbane-Caboolture-Bribie-Redcliffe-Brisbane loop:
Bongaree Caravan Park: $32.50 per night
Bribie Island Caravan Park: $29 per night
Caboolture River Caravan Park: $27 per night
Bells Caravan Park (Redcliffe): $Who knows, can’t find their web site
Scarborough Holiday Village: $32 per night
Yeesh. For those rates, we might as well stay in some fleabag motel.
I did look up national parks and the like. If we want to camp in an approved camping place at Bribie, we can do so for around $12 or so. But don’t expect drinkable water, toilets or showers. It’s making the caravan park look attractive. The fleabag motel too.
Actually, it’s making riding to Bribie and back in one day look much more appealing. 😡
Exped tents
I had occasion to visit the K2 Base Camp store in Fortitude Valley this afternoon. I’d gone there with the intention of getting the low-down on an Exped Andromeda II Plus tent, a huge 3-person tent with a vestibule big enough to fit two bikes. We were served by a very knowledgeable fellow, Brad, who answered all our questions. They didn’t have an Andromeda in stock, but that didn’t stop Brad from showing us the rest of the Exped range. He suggested the Sirius II would be the closest match of the tents they had in stock. Completely unprompted, Brad pulled a Sirius II out of its packaging and set it up on the floor in front of us. One thing I think I knew but didn’t really appreciate is that the Andromeda (and the Sirius) is not free-standing. It needs to be guyed out in order to maintain its shape. Of course, we couldn’t guy out the Sirius II in the shop, and it drove home to me how much of a nuisance that would be if we needed to set up our tent on a hard surface.
Brad showed us how to pack the tent up, and would you believe it, it actually fit right back into the package it came from!
Once I saw the Sirius II set up, I decided we’d need to rethink our tent choice. So I asked Brad to show us the free-standing tents. He showed us the Venus II and the Orion.
Venus II:
Orion:
Both tents are about the same size, and both have vestibules on either side. However, the Orion is slightly taller, which translates into a somewhat larger vestibule space. There’s just enough room for two adults to lie side-by-side in the main area of the tent. The vestibules appear to be big enough to hold our panniers. I like the Orion better than the Venus because of the slightly taller ceiling and because of the larger vestibules.
Some demos on the Orion:
Venus videos:
The Venus does come in a 3-person variety, however, whilst the Orion is 2-person only:
So there is much to think about. At this stage, I’m leaning towards the Orion. I’ll have to look at MSR’s equivalents and see what real-world reviews have to say about them.

